Getting started on Windows
Downloading the software
To download the latest version of the IPKISS Photonics Design Platform, sign in or request an account on the Luceda customer portal. You will find a download link in your personal account page.
We also advise you to use a Python IDE, more information on how to download and install one can be found here: Downloading & installing Python editor
Installing the software
After opening the executable installer, please follow the steps of the installation program. The installation will proceed in two steps: it first extracts all files to the installation folder, and then sets up the initial ipkiss3 environment. The installation can take up to 10-15 minutes.
Note
The installer takes a while to start. Please be patient while the installer is working in the background. You may receive the message “Windows protected your PC”. If this happens, please click More info and then press Run anyway.
Note
Please don’t click inside the terminal while it is installing. This would cause the installation to pause due to how the Windows Terminal works. If the windows terminal does get paused in this way, press any key to resume the installation.
After the installation, you can choose to launch Luceda Control Center. Alternatively, you can find the control center in your start menu, as shown below:
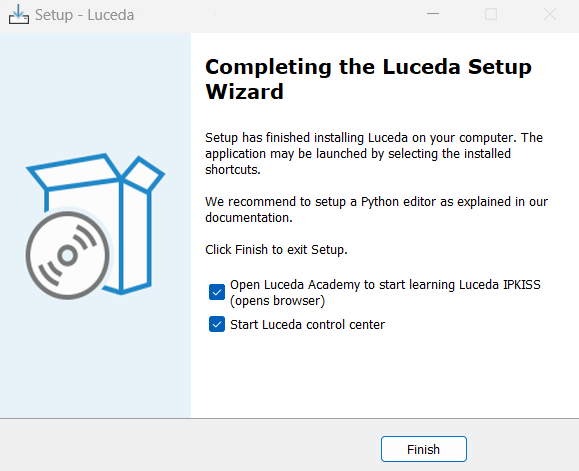
In the final step of the installer, you can choose to start Luceda Control Center.
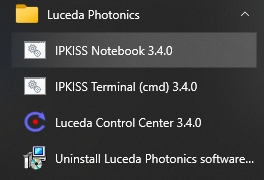
You can also start the Luceda Control Center from the start menu.
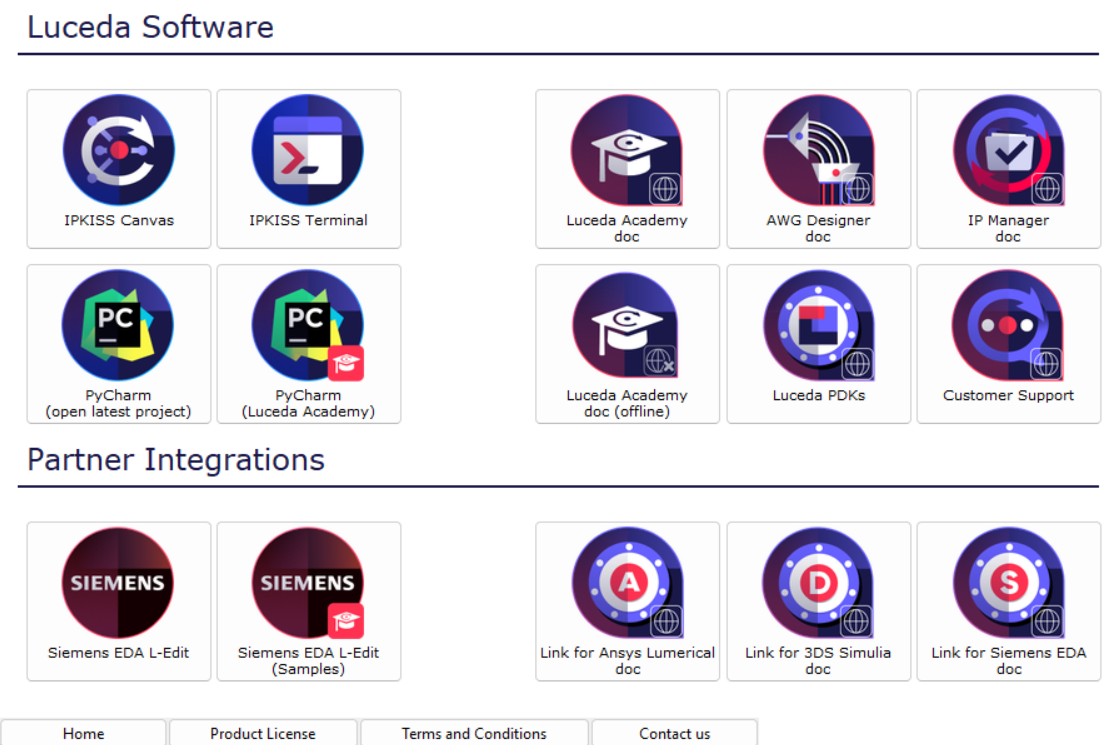
Luceda Control Center allows you to manage your installation and get access to useful resources.
Installing your license
You can activate your license by clicking on Add License in the Product License tab of the Luceda Control Center and selecting your license file.
You can also put the license file in the C:\luceda\luceda_3112\python\envs\ipkiss3 manually.
More information about licenses can be found in the License types section.
If you have a floating license, please follow these instructions: Configuring a floating license.
Get started
You are now ready to start diving into our software, a good starting point is Circuit layout.
The following contents can also further help you getting started with IPKISS.
Click on PyCharm (Luceda Academy) in the Luceda Control Center to open the Luceda Academy project (which is available in the %USERPROFILE%\luceda\luceda_academy\luceda_3112 directory in your home folder).
- From here on out, you can dive in the code:
The tutorials contain step by step instructions to create various examples.
The sample gallery is a collection of in depth examples.
The application examples provides demonstrations of complete photonic integrated circuits.
If you want to start your own project, you will have to configure your Python IDE (Integrated Development Environment). This is explained here: Setting up your environment.