Library organization
This document describes how to organize your libraries in IPKISS. This document is useful both if you use only the scripting environment of IPKISS (part 1 - part 3), and when you use OpenAccess enabled EDA tools that interact with IPKISS (part 1 - part 5).
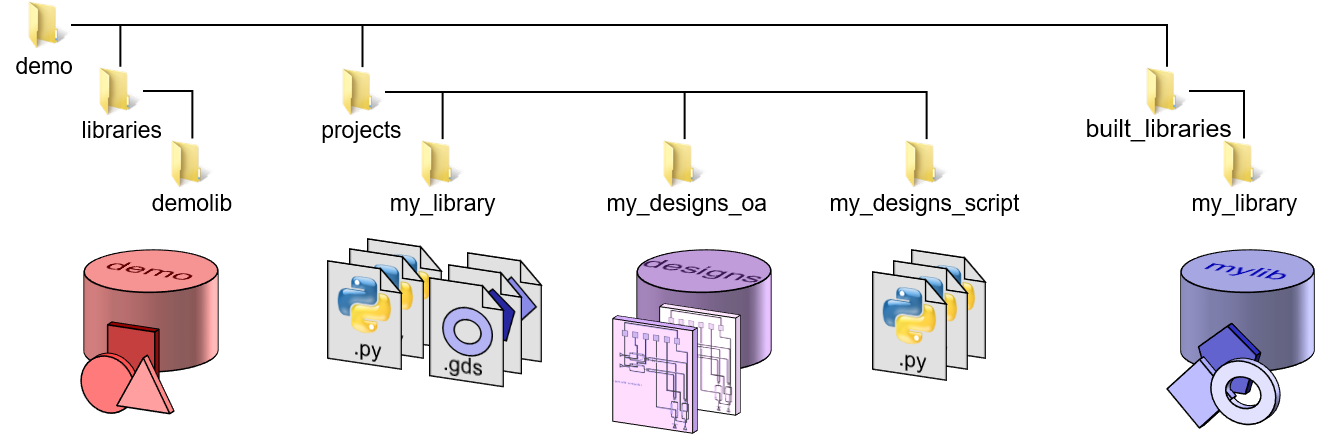
We explain the organization based on a hypothetical ‘demo’ project and ‘demolib’ pdk. Below is an overview of the folder structure, the si_fab PDK that is distributed with the samples has a similar structure.

Library organization in IPKISS: folder structure of the demo library and project.
The tutorial is structured around 5 parts, which are visualized below:
Library organization in IPKISS. In this tutorial we will go over the different aspects step by step.
Step 1: The PDK
In a typical design project, a PDK (Process Design Kit) is used. A PDK is a library,
with additional information such as a library handbook, measurement data, specific settings for different design tools,
and so on. You can start from a demonstration library (called si_fab, which is included with the samples), or from one of the
supported PDKs.
The PDK has to fulfill a certain folder structure (Figure).
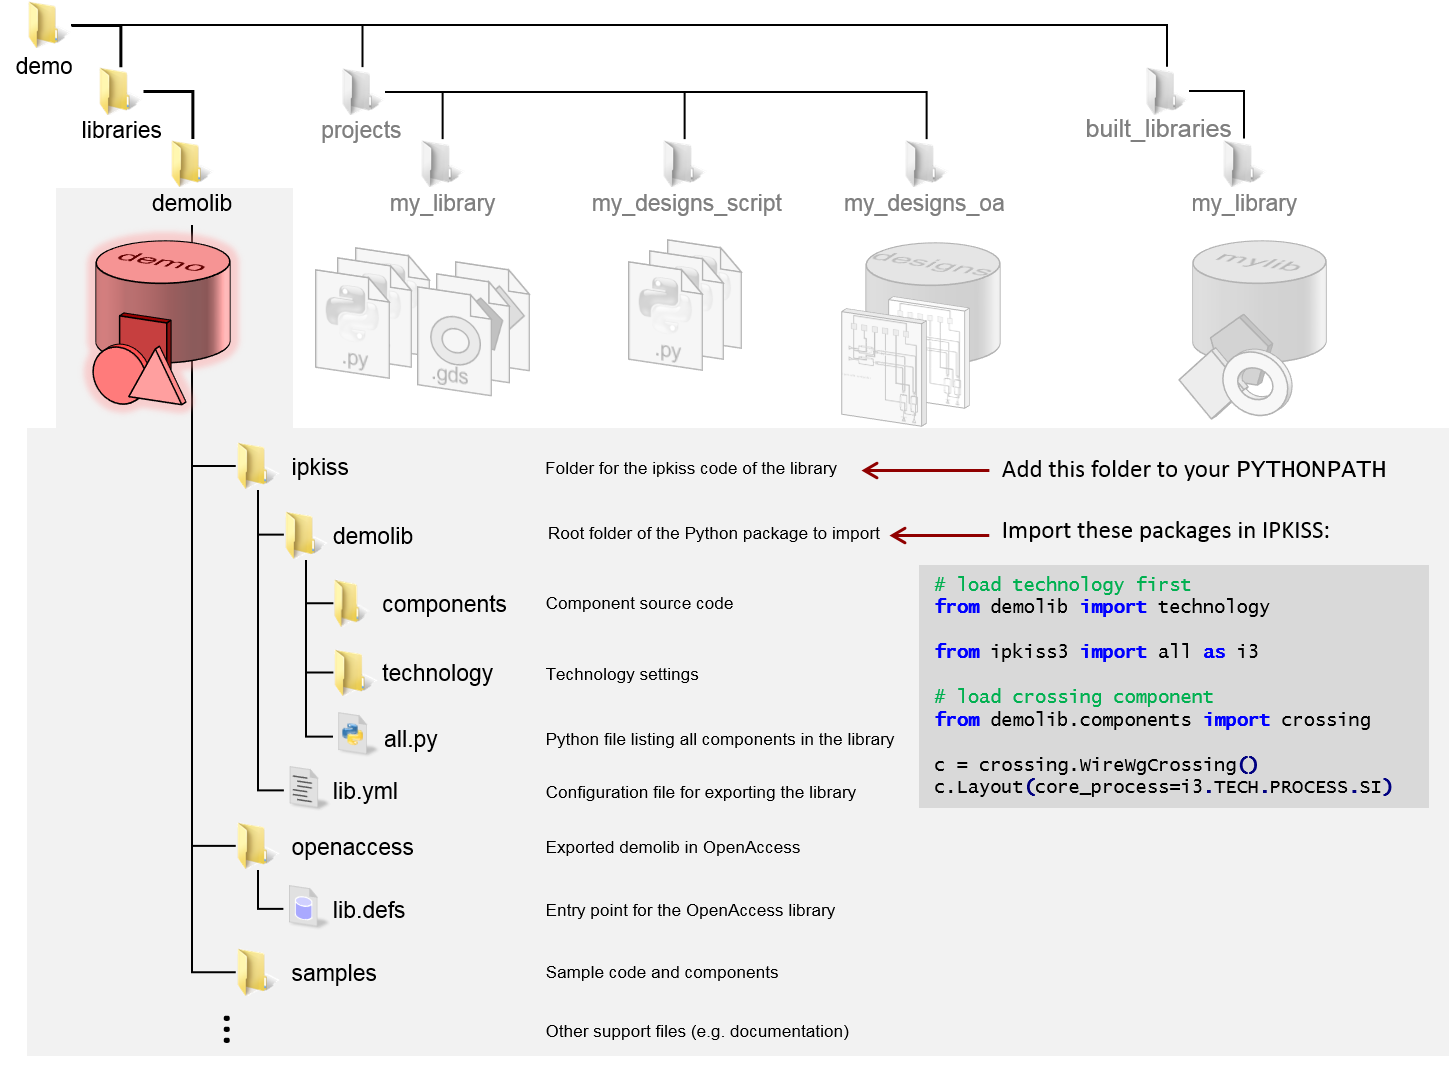
A PDK (Process Design Kit). A PDK may contains information for different tools (IPKISS, OpenAccess).
Step 2: User libraries
A user library is a self-contained package that contains additional components, and optionally, technology settings, that a user wants to reuse across different designs. For example, a telecom company may build their own switches and keep that as IP blocks, inside their own libraries. A user library typically targets a certain PDK (because it uses that technology’s process layers, optical settings etc), but it may also be retargetable. A retargetable library (such as the picazzo library in IPKISS) may be reused on different technologies, and ideally makes as little assumptions on the technology as possible.
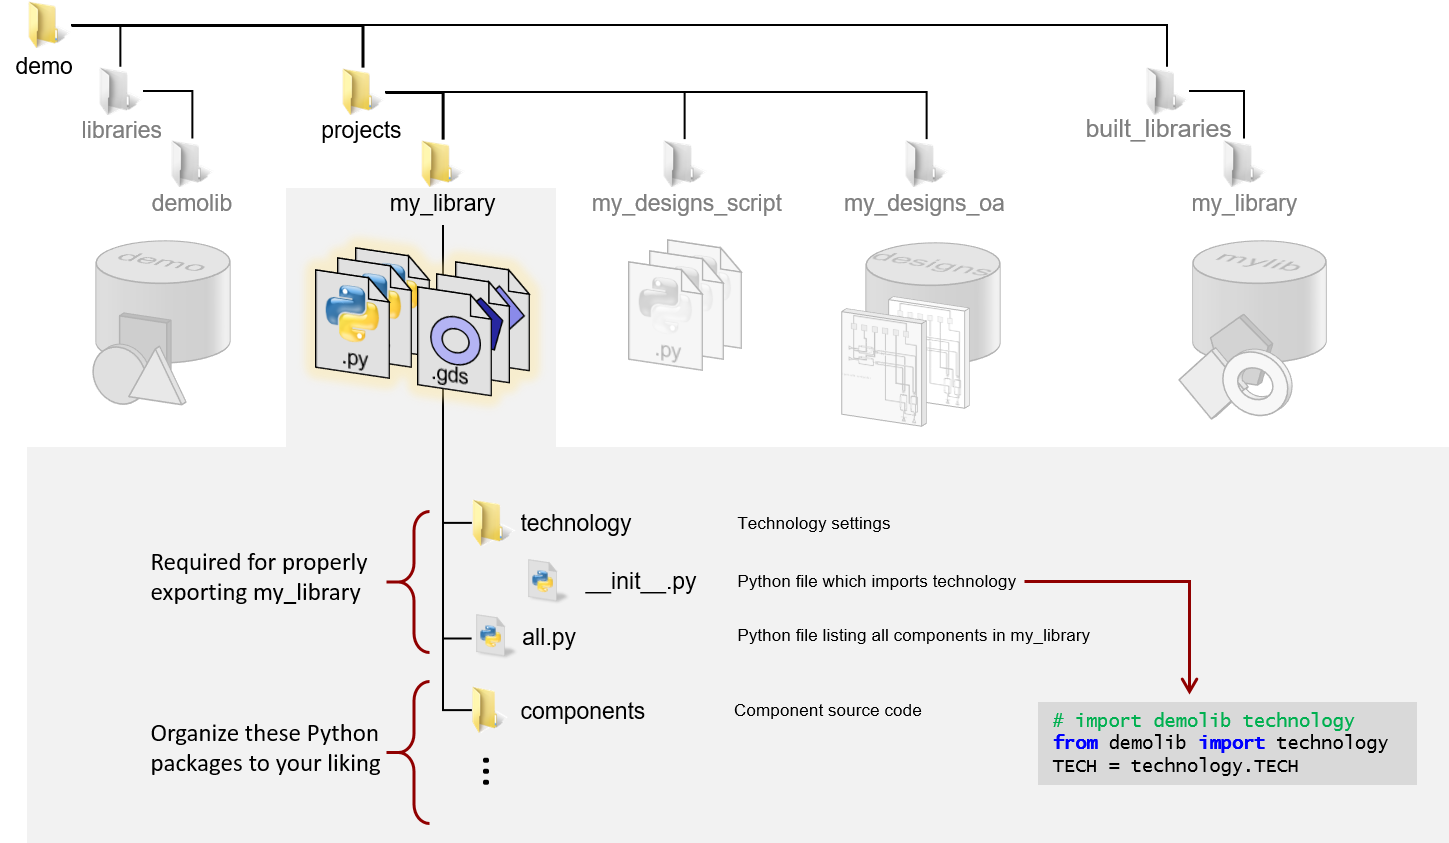
User libraries are packages with IPKISS pcells and possibly additional technology settings, that can be reused across several projects.
Step 3: Designs in IPKISS (code-based)
In this situation, a user defines a series of optical and opto-electronic components and circuits in IPKISS using a Python script. Then the user performs operations on them, such as generating GDS files, running physical simulations, circuit simulations, and so on.
One important aspect of managing your designs is explaining to Python where each library is located.
This is done using the PYTHONPATH environmental variable.
It can be set in the project, or it can be defined in each executable Python script.
This is illustrated in the figure below:
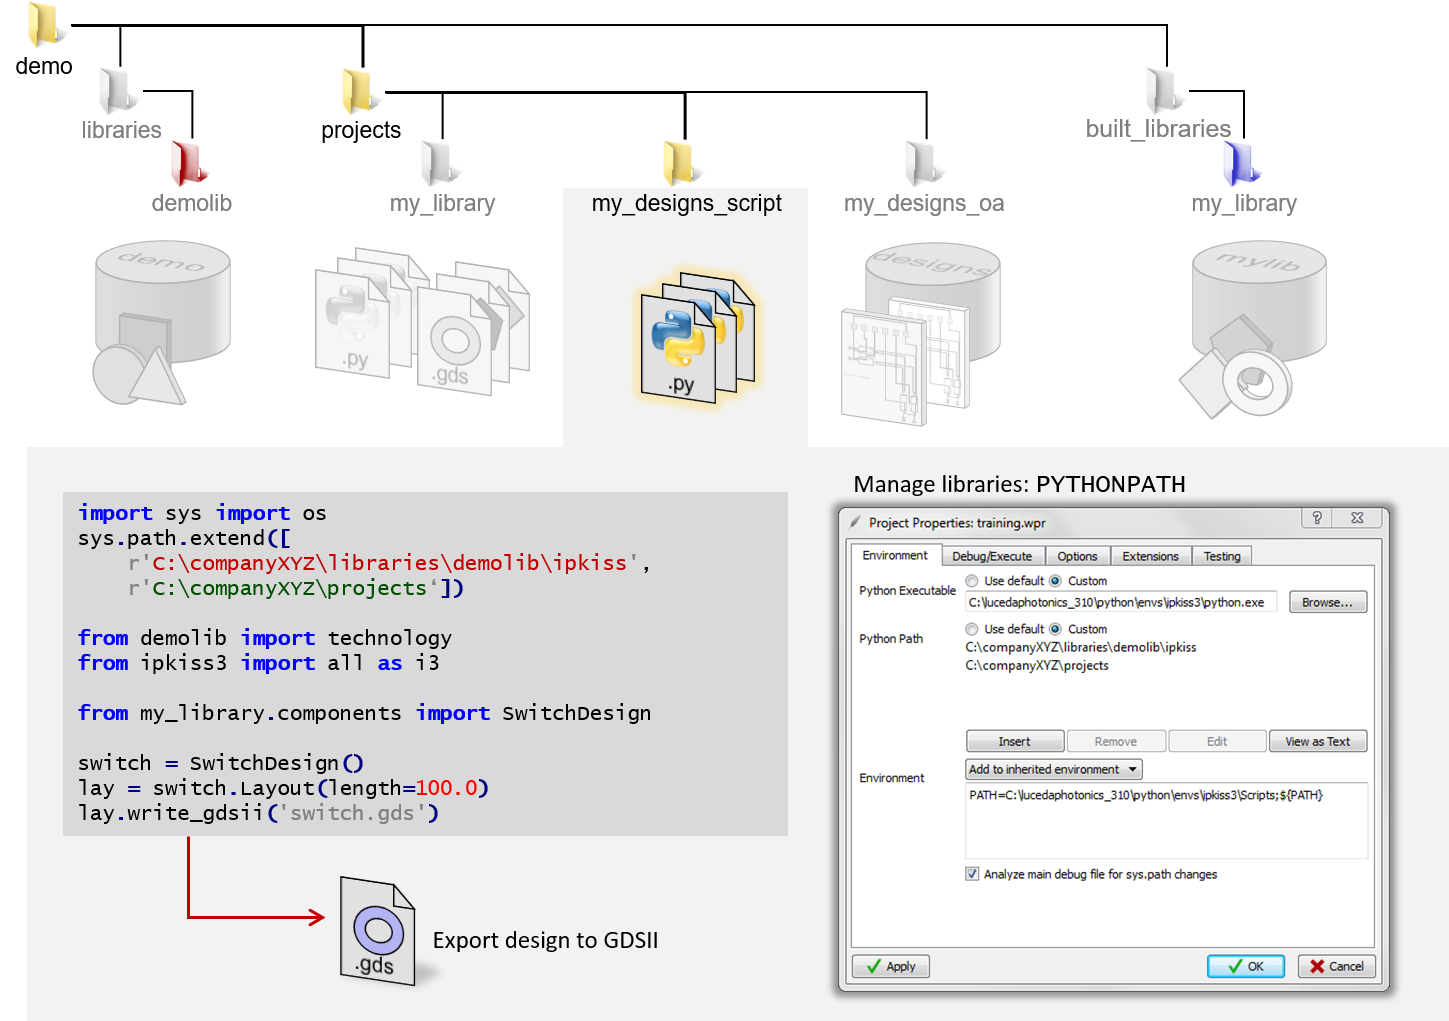
Code-based designs in IPKISS.
In general, a code-based approach to declaring designs and components is practical for the following use cases:
You want to write parametric cells that can be reused, and/or you want to manage hierarchical complexity.
You want to write parameter sweeps for Design Of Experiments (DOE).
You want to generate layout features that are difficult to draw by hand.
Process the information of your components in a (semi-)automated way. For example, export the layout for physical simulation, run circuit simulation sweeps with varying parameters, export port information for a measurement system, integrate your IPKISS components with other tools, etc.
Step 4: Designs in IPKISS (OpenAccess based)
When designing in L-Edit, we use OpenAccess as database format.
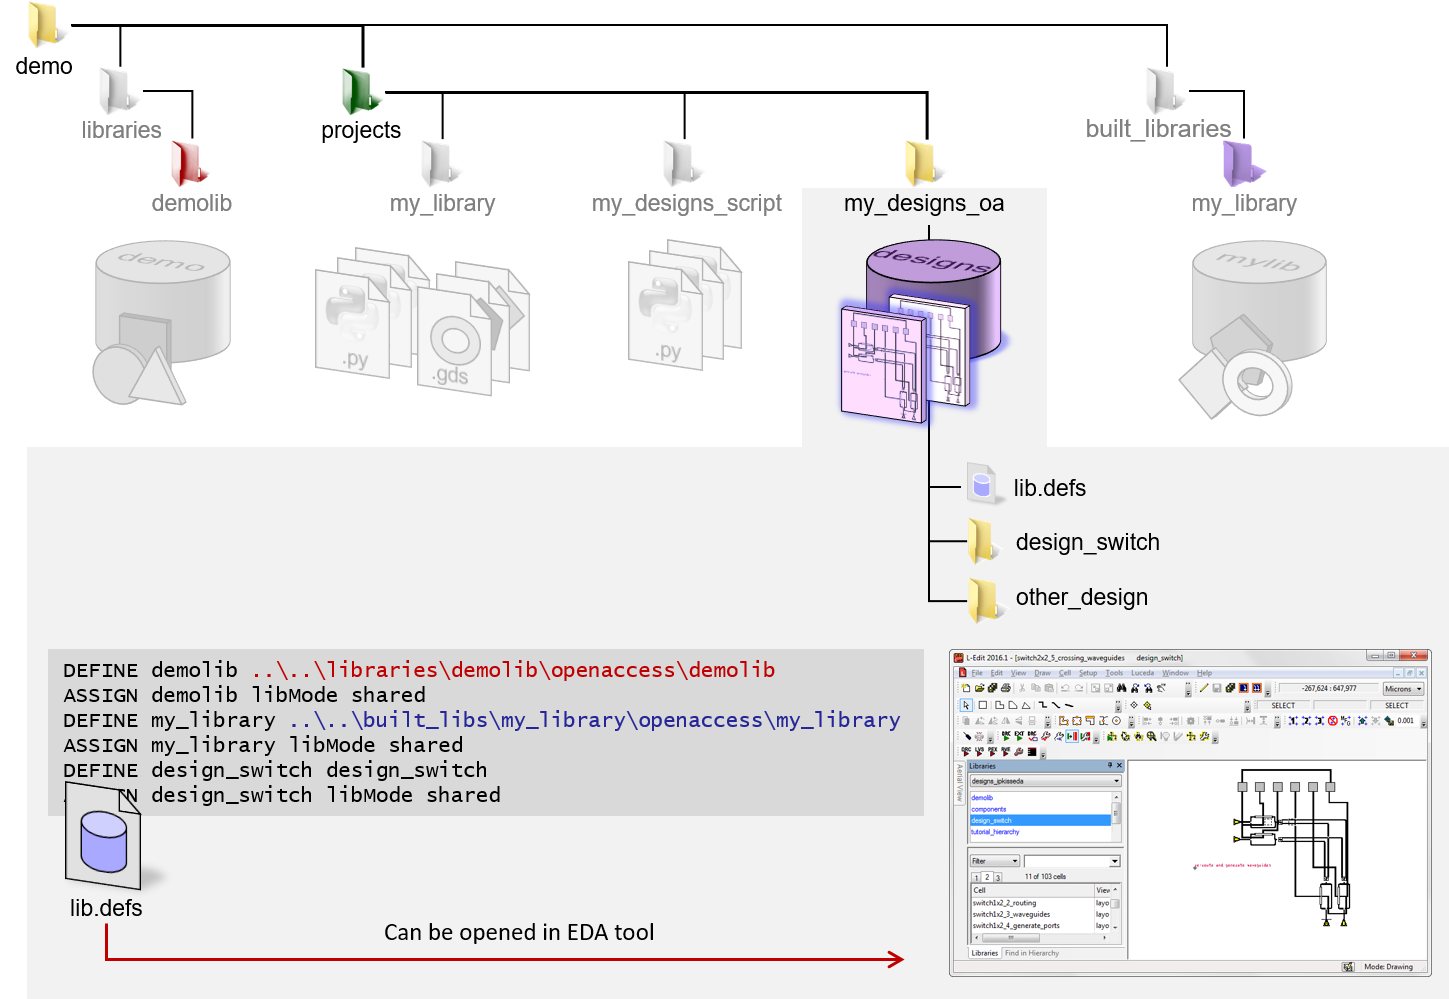
Designs in our Link for Siemens EDA module are OpenAccess based. We use L-Edit as the GUI front-end for photonic + electronic design.
Typically, L-Edit is used if you want to do the following things:
You want to quickly prototype your next circuit using drag-and-drop and visual routing.
You want to do a lot of electronic routing (either manual, or using the routing functions from L-Edit).
You want to make your chips more compact, and do this in a visual, iterative workflow (i.e., place components, route, replace, reroute, until you’re satisfied).
You want to reuse established EDA workflows such as schematic driven layout.
Step 5: Exporting user libraries to OpenAccess
As you may have noticed in Step 4: Designs in IPKISS (OpenAccess based), we need to use an OpenAccess version of my_library in order to build designs in OpenAccess. To build an OpenAccess version of my_library, we use the build_library function from oatools.library.build. As a convention, we put all exported libraries in built_libraries. In your project file lib.defs, you then need to add the new library. Alternatively, you can right-click in the Libraries pane, and select Add\remove libraries, and then add the library from there.
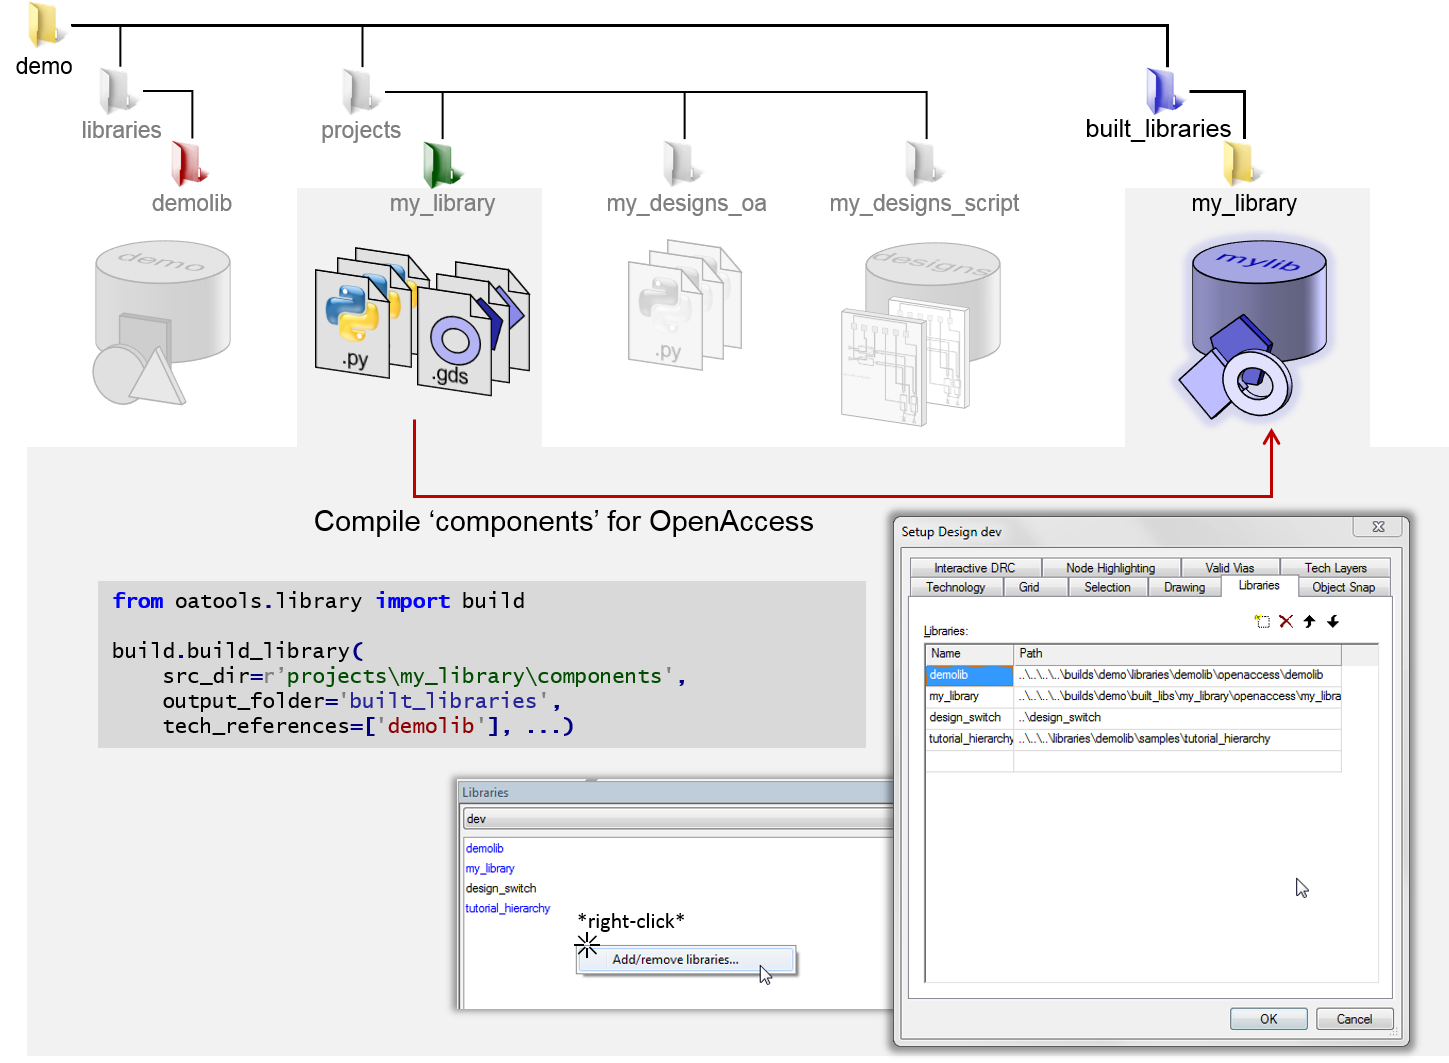
Exporting my_libraries to OpenAccess, so they can be used in an EDA tool.
Each time you modify your IPKISS components in my_library, you will need to rebuild the library, otherwise you will not get the new changes inside your EDA environment. Note that the IPKISS source code is copied to the built_libraries, too. Each time a PCell evaluation occurs (i.e., you create a new instance, or change the parameters of an instance), the code will be executed.