Advanced examples
The options for placement and routing are more extensive than what are covered in the tutorials. In these examples we will see several powerful methods that provide additional tools for circuit layout design.
Generalized splitter tree
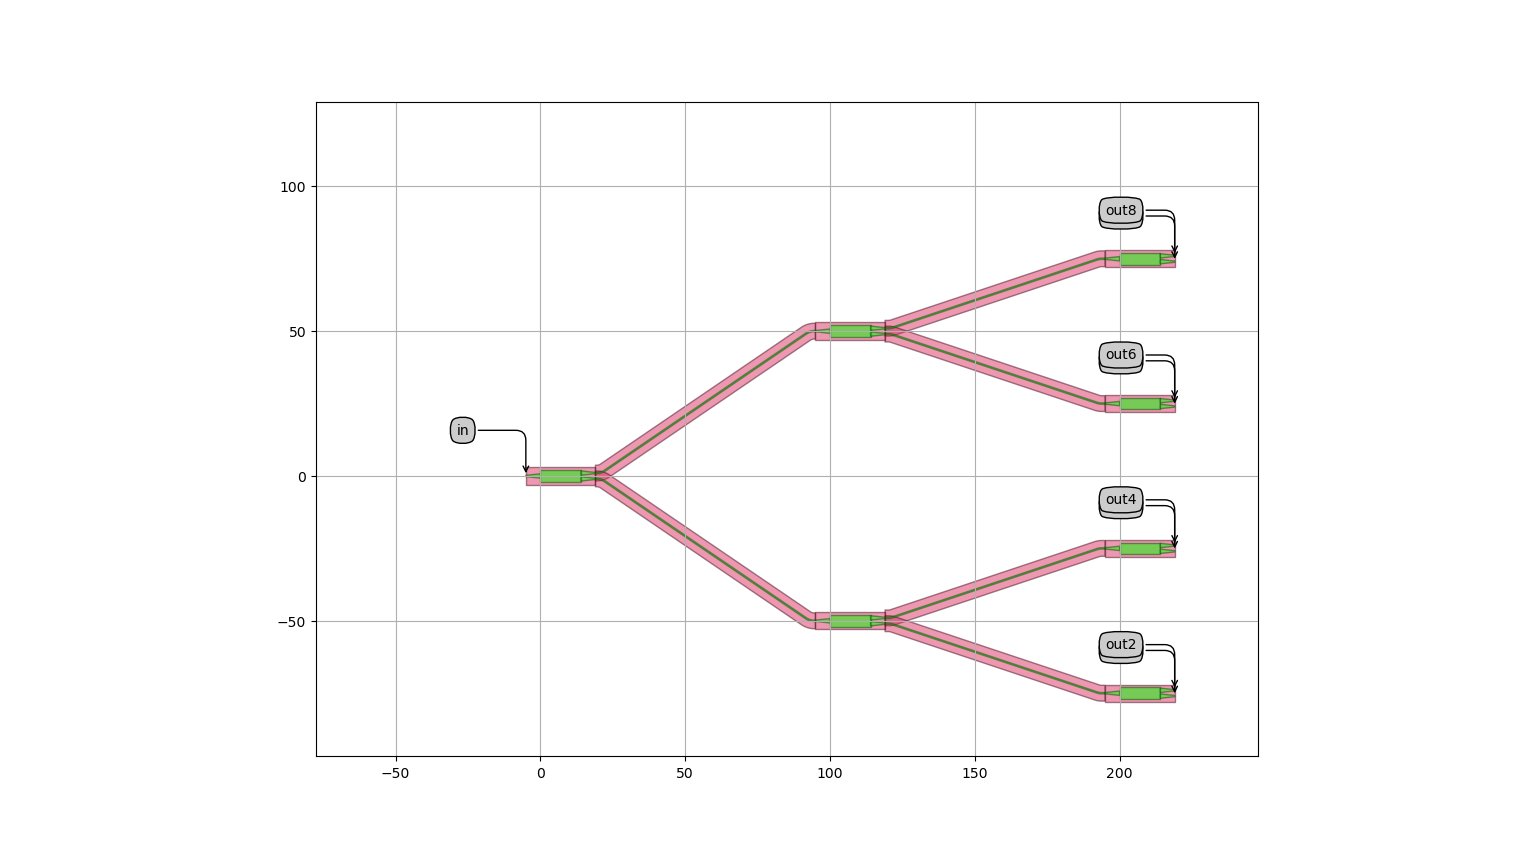
Three-level splitter tree made in the tutorial
In the getting started tutorials we designed a splitter tree circuit.
That design is already parametric, with the spacing between various components and the type of splitter used all being parameters.
We can extend this approach even further, creating a circuit that is parametric to the number of levels in the splitter tree.
To do this, all the instance creation, placement and routing must be parametric so that we simply pass in the size of splitter tree we want and the circuit is built for us.
Whilst this may sound complicated, there are actually very few methods needed for this that we have not already seen.
We will use a combination of f-strings and for loops with some basic logic to achieve the desired circuit.
By nesting a for loop within another for loop, we can iterate though each splitter in each level and add them to our instances dictionary.
        for level in range(self.n_levels):
            for splitter_no in range(2**level):
                insts[f"sp_{level}_{splitter_no}"] = self.splitter
        return insts
The placement is done in a similar way, where using nested for loops we can place all the MMIs at once.
        for level in range(self.n_levels):
            for splitter in range(2**level):
                x_coord = level * self.spacing_x
                y_coord = self.spacing_y * (
                    -0.5 * 2 ** (self.n_levels - 1) + ((splitter + 0.5) * 2 ** (self.n_levels - level - 1))
                )
                specs.append(i3.Place(f"sp_{level}_{splitter}", (x_coord, y_coord)))
We can also make use of Python logic to add another layer of control to our design. Since each splitter has two outputs, we can iterate through the splitters at each level and determine their connections based on whether the splitter number is even or odd. This allows us to connect all the splitters in each level with the splitters in the following level (except the last one) in a single for loop.
        for level in range(1, self.n_levels):
            for splitter in range(2**level):
                if splitter % 2 == 0:
                    in_port = f"sp_{level-1}_{int(splitter/2)}:out1"
                else:
                    in_port = f"sp_{level-1}_{int(splitter/2)}:out2"
                out_port = f"sp_{level}_{splitter}:in1"
                specs.append(i3.ConnectBend(in_port, out_port))
In this way, we can build a very large circuit with hundreds of outputs from the same code just by changing the number of splitter levels. You could extend this example to take the number of outputs as a parameter instead of the number of levels as an additional exercise.
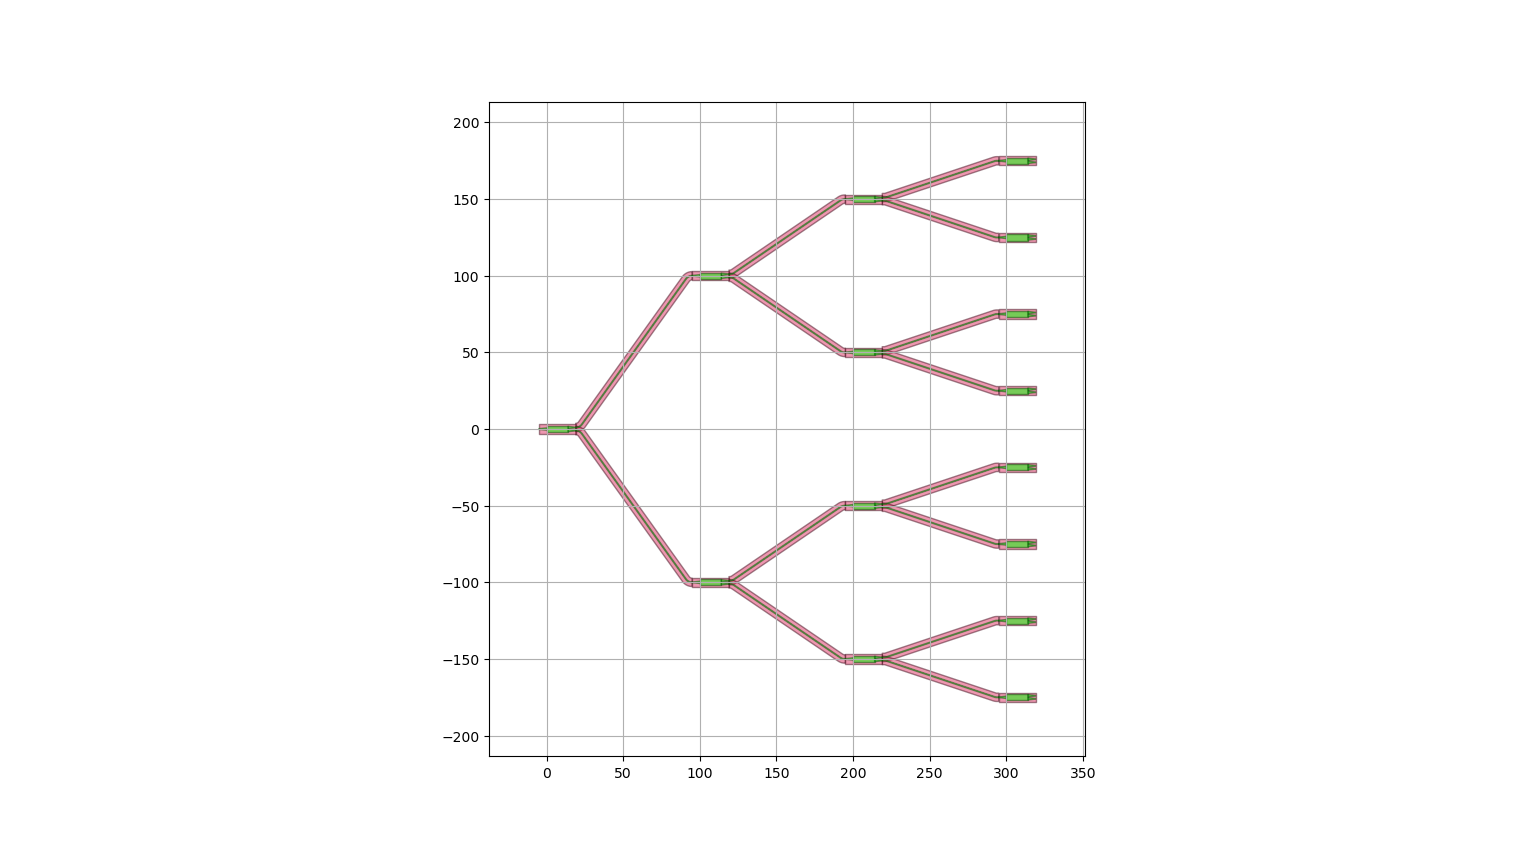
Four-level splitter tree made using the GeneralizedSplitterTree class
Advanced layout options
Using the parametric splitter tree, we can now create a more complicated circuit using bundle routing and control points as well as some alignment options. To reuse the splitter tree circuit, we first import it from the other script and then rename it to Tree.
from explore_generalized_splitter_tree import GeneralizedSplitterTree as Tree
Then we can pass parameters from the new circuit into the previous splitter tree to reuse it with a different number of levels.
splitter_tree = i3.ChildCellProperty(doc="Splitter used.")
One of the new features in this circuit, is the addition of a waveguide crossing.
We can use AlignV and AlignH to position this crossing in line with existing ports, to reduce the number of bends in the circuit.
By providing these specifications to the specs property of i3.Circuit, we can constrain the location of the crossing allowing the placement engine to resolve its coordinates.
            i3.AlignV("crossing:out2", "test_input_gc:out"),  # used to align an instance in one axis to another port
            i3.AlignH("crossing:in1", "tree:in"),
The waveguide that connects the south port of the crossing with the grating coupler array needs to be routed below the splitter tree otherwise, the waveguides will cross.
We achieve this using a control point.
In this example, we use i3.H to specify a horizontal coordinate position that the connection must pass through.
This point can be defined from the parameters that create the splitter tree, ensuring it will work regardless of the splitter tree size.
It is also possible to pass a list of control points for more advanced routing if necessary.
            i3.ConnectManhattan(
                "crossing:in2",
                "test_output_gc:out",
                control_points=[i3.H(-self.spacing_y / 2, relative_to="tree@S")],
            ),
For connecting the output of the splitter tree, with the array of grating couplers, we make use of the bundle connector.
This connector, called ConnectManhattanBundle, lets us connect multiple input and output ports with the waveguides running parallel to each other.
We use list comprehension to pass a list of the connections to it and set some parameters to control the shape of the fanouts and spacings.
        specs.append(
            i3.ConnectManhattanBundle(
                connections=[
                    (f"tree:out{n+1}", f"tree_output_gc_{2**self.n_levels-1-n}:out") for n in range(2**self.n_levels)
                ],
                start_fanout=i3.SBendFanout(max_sbend_angle=90.0, reference=f"tree:out{2**self.n_levels}"),
                end_fanout=i3.SBendFanout(max_sbend_angle=90, reference=f"tree_output_gc_{2**self.n_levels-1}:out"),
                pitch=10,
                bend_radius=5,
            )
        )
This example circuit could be designed in a way to avoid some of these challenges, but it is a good demonstration of how even complex circuits can be defined easily and parametrically.
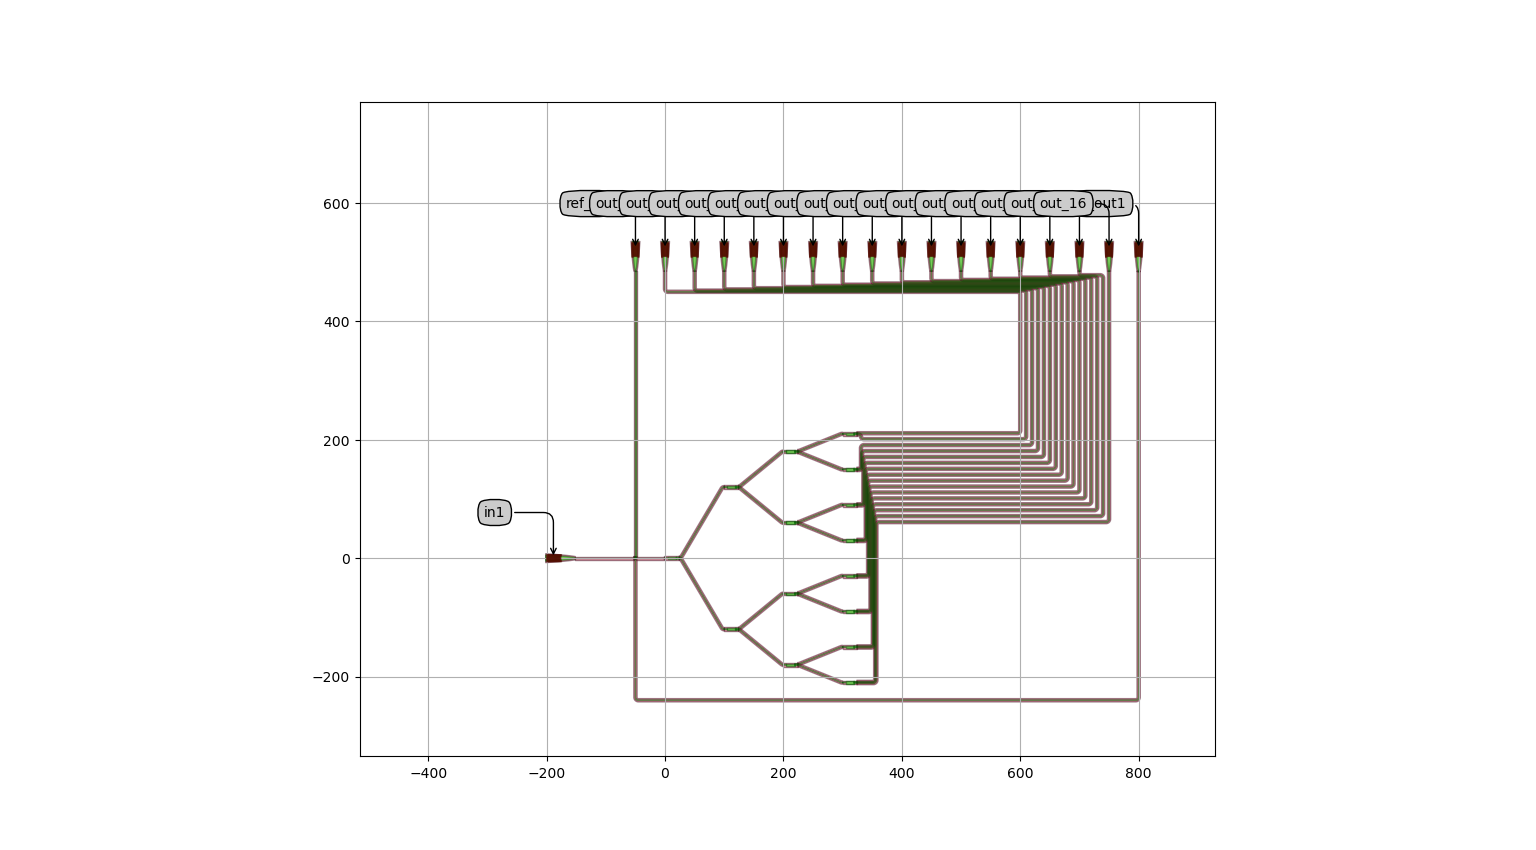
A routed splitter tree, connected to grating couplers using ConnectManhattan(Bundle)